
Pre-Installation Checks for BLDC Fans: Things to Verify Before Fitting
- Why Pre-Installation Checks for BLDC Fans Matter
- Pre-Installation Checks in the Room
- Pre-Installation Checks When the Fan Arrives
- Tools and Safety Gear to Keep Ready
- Smart BLDC Fan Pre-Installation Checks
- Final Checks Just Before Switching On
TLDR
- Power off the circuit before starting
- Check ceiling hook strength early
- Verify all parts in the box
- Remove old regulator and replace
- Keep manual and warranty card ready
Introduction
A BLDC ceiling fan is a smart upgrade. Lower bills. Quieter rooms. Longer fan life. But the value of all this depends on one thing. A clean, careful installation.
Most installation problems do not happen during fitting. They happen because the right pre-installation checks for BLDC fans were not done first. A loose ceiling hook. A wrong regulator. A missing screw in the box. Each one can turn a quick job into a long headache.
This blog gives you a clear checklist of every check to run before your BLDC fan goes up. Follow it once, save yourself a lot of trouble later.
Why Pre-Installation Checks for BLDC Fans Matter
A checklist may sound like an extra step. It is actually the step that saves time. A few minutes of pre-installation checks for BLDC fans saves hours of rework, returns, and warranty claims afterwards.
Skipping checks creates real costs. A weak ceiling hook may need rework after the fan is up. A damaged blade may force a return. A wrong regulator may burn the fan controller within days.
A small list, used well, turns the whole installation into a smooth process from start to finish. This is especially true for apartment projects where multiple units are installed at once. A single missed step repeated across dozens of floors can quickly multiply into a larger problem. Developers planning bulk installation of apartment BLDC fans know that a clean pre-installation process helps keep handover timelines on track.
Pre-Installation Checks in the Room
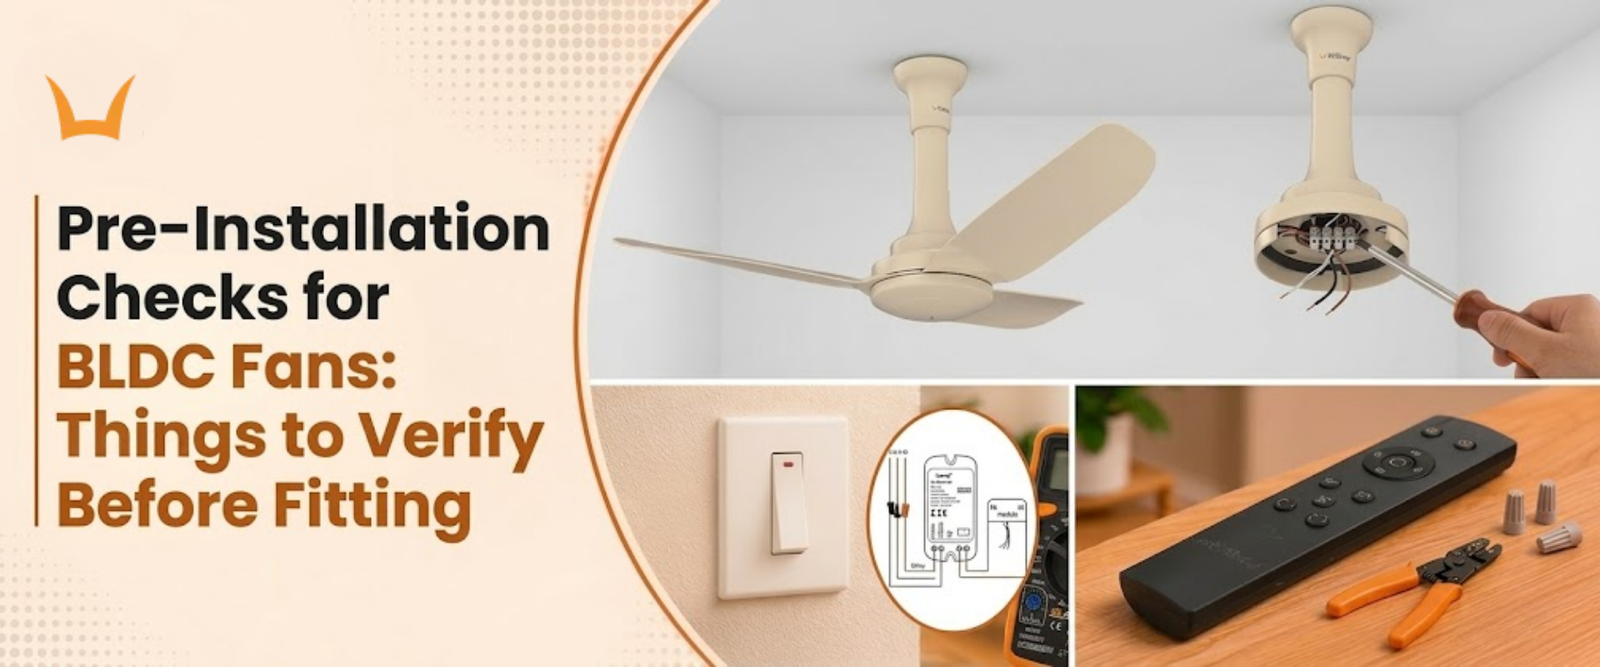
Ceiling Hook Stability
The first thing to check is the ceiling hook. It must be firm and not loose in any direction. Try gently pulling it down to test the hold.
If the ceiling hook feels weak or shows signs of rust, it should be replaced before installation. Since Syona BLDC fans are heavier than conventional ceiling fans, a strong and properly secured hook is essential for safe and stable installation. A durable ceiling hook forms the foundation of reliable fan mounting.
Wall Switchboard Setup
Open the switchboard cover and look at what is inside. If your old fan ran on a wall regulator, that regulator must be removed before the BLDC fan goes up.
Replace it with a normal switch. The new fan controls speed through its remote, not the wall, because BLDC fans do not require special wiring .
Power Supply and Earthing
Confirm the room has a steady power supply with proper earthing. Run a quick voltage check at the wall point. The earth wire must be connected and working, especially in places where BLDC fans need stabilizers for unstable power supply.
A missing or weak earth connection is more than a comfort issue. It is a safety risk. Always confirm earthing before fitting any fan.
Pre-Installation Checks When the Fan Arrives
Box Contents Match the Manual
Standard contents typically include the motor, blades, downrod, mounting bracket, canopy, screws, remote control, receiver unit, safety wire connection, safety switch components, and warranty card.
If anything is missing, raise it with the seller before installation begins. Adding parts mid installation slows down the whole process.
Visible Damage on Motor and Blades
Inspect the motor housing for dents, scratches, or signs of impact. Check the blades for cracks, bends, or warping. Even small damage can cause wobble or noise once the fan is running.
A damaged unit is far easier to return before fitting than after. Always inspect first, install second.
Remote, Receiver, and Battery
Test the remote with the supplied battery. Press a few buttons and listen for the click. Check that the receiver unit is sealed and not loose inside its packaging.
It is important to check whether the remote and receiver are working properly before installation. If either component is faulty, replacing or repairing them after the fan is installed can be more difficult and time-consuming.
Tools and Safety Gear to Keep Ready
Keep the right tools within arm's reach before starting. An L-key set, a voltage tester, a wire stripper, insulation tape, and a pair of pliers.
A sturdy ladder is non-negotiable. Avoid using stools, chairs, or boxes. Choose a ladder that lets you reach the ceiling comfortably without stretching.
For safety, keep a tester ready to confirm the power is off at the wires. Wear safety glasses to protect against falling dust. Inform others in the home that the power is being switched off so no one switches it back on midway.
Smart BLDC Fan Pre-Installation Checks
If your BLDC fan supports WiFi or voice control, a few extra checks save time later.
Check that your home WiFi is reachable in the room where the fan will be installed. A weak signal will make app and voice control unreliable.
Download the brand app on your phone before installation. Create the account, sign in, and keep it ready. The app will guide pairing once the fan is up and running.
Final Checks Just Before Switching On
Once the fan is fitted, run through a few last checks before turning the power on.
Confirm all wire connections are tight. Loose connections cause heat build up over time. Pull each wire gently to make sure it does not slip.
Check that the canopy is firmly in place. Look at the blades. They must be evenly aligned with no visible tilt. A wobbly blade today becomes a noisy fan tomorrow.
Make sure no tools are still on the ladder or near the fan. Falling tools after switch on are a common accident.
Now switch on the breaker. Start the fan at low speed. Listen carefully for any unusual sound. Watch for wobble. Run through all speeds with the remote. If anything feels off, switch off and recheck before using the fan.
Keep the manual and warranty card safely. Note down the date of installation. Some brands ask for proof of installation date during warranty claims.
Conclusion
A BLDC fan installation is quick, but only when the prep is done right. Proper pre-installation checks for BLDC fans cover the room, the fan, the tools, the smart setup, and the final pre-switch on review.
Spending a few minutes on this checklist protects your fan, your home, and your peace of mind. The right preparation makes the difference between a smooth upgrade and a frustrating one.
Syona is a trusted fan manufacturer whose BLDC ceiling fans ship ready with every part included and clear installation guidance to make the process smooth from start to finish.
Looking for a BLDC ceiling fan that ships ready and installs cleanly?
A proper installation begins long before the fan is switched on. Checking the wiring, ceiling hook, regulator setup, and fan components in advance helps avoid performance issues, installation delays, and unnecessary maintenance later. Most people only discover missing screws or wrong connections halfway through balancing on a ladder like an exhausted electrician in a survival documentary.
Choose reliable and energy efficient BLDC ceiling fans from Syona Roots designed for smooth installation, quieter performance, and long term everyday comfort.
